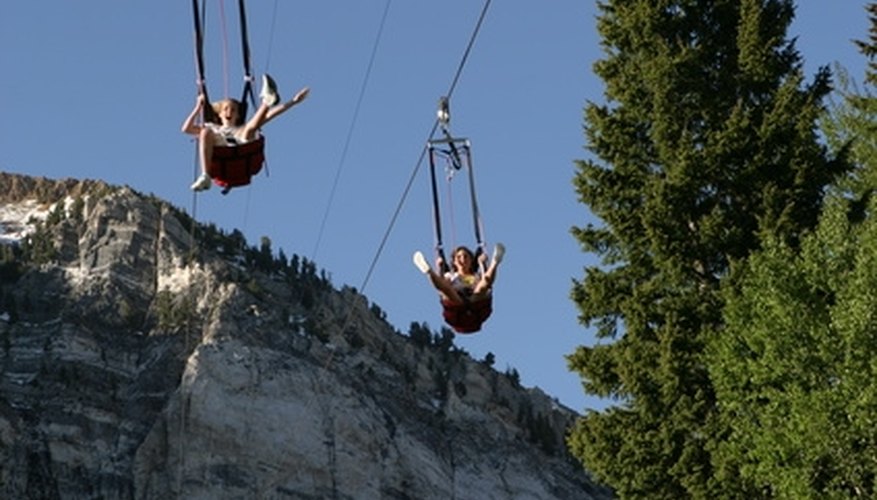

Rock climbing offers many picturesque and serene diversions in the outdoors, but one of the most exhilarating activities to try using climbing equipment is to create a zip line. A zip line offers a fun, fast ride to anyone regardless of athletic ability, and it has little risk when set up correctly with the right equipment. Zip lines can be rigged over hillsides or across canyons, and they provide a thrilling way to launch into deep water.
Items you will need
Static rope
4 carabiners
2 slings
Pulley
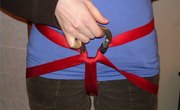
Harness (optional)
Anchor the zip line rope to the upper anchor with a knot that forms a nonclosing loop. Stable knots include a double bowline or a figure of eight on a bight (see the Resources section). Clip a carabiner into the body of the knot so that the knot cannot seize too tightly to be untied.
Tie a sling around the lower anchor with a water knot or a double fisherman's bend to serve as a secure loop. Clip a carabiner around the loop to act as the lower anchor master point.
Tie an alpine butterfly knot in the zip line approximately 5 feet short of the lower anchor master point. The alpine butterfly knot creates a loop that will not close tightly and is easy to untie after heavy loading. Clip a carabiner through the loop in the alpine butterfly knot.
Put tension on the rope at the lower anchor by passing the free end of the rope through the master point and then through the carabiner in the alpine butterfly knot and pulling tight. This arrangement creates a three-to-one advantage to tighten the rope, effectively multiplying your strength by three and allowing you to tighten the rope further than you would be able to do by hand.
Secure the free end of the rope to the master point with an anchoring knot such as a clove hitch or a round turn and two half hitches. Optionally, use the remainder of the rope to build redundancy into the system by passing the rope around the lower anchor itself and tying another anchoring knot.
Ride the zip line. Load the pulley onto the zip line, clip a carabiner into the pulley and clip a sling into the carabiner. If the zip line is low to the ground, like following a sloping hillside, the rider can hang on to the sling. If the zip line is high off the ground at any point, the rider should clip into the sling with a harness.
Warnings
- Climbing and high-ropes courses can be dangerous if set up incorrectly or with inferior materials, resulting in serious injury or death, so seek professional guidance and do not cut corners on safety equipment.
- Avoid cheap hardware store rope: due to the strong tension already on the rope plus the weight of the rider, zip line ropes must hold many times the rider's weight.
- Purchase a high-speed pulley made for rope. Friction from the ride can quickly overheat pulleys not intended for zip lines.
Tips
- A helper should stand ready at the bottom of the zip line to assist in braking. Alternatively, the rider can self-brake by clipping a carabiner to the zip line behind the pulley; to brake, simply pull down on the carabiner to increase friction and slow down.
References
- "Rock Climbing Anchors: A Comprehensive Guide"; Craig Leubben; 2007
Tips
- A helper should stand ready at the bottom of the zip line to assist in braking. Alternatively, the rider can self-brake by clipping a carabiner to the zip line behind the pulley; to brake, simply pull down on the carabiner to increase friction and slow down.
Warnings
- Climbing and high-ropes courses can be dangerous if set up incorrectly or with inferior materials, resulting in serious injury or death, so seek professional guidance and do not cut corners on safety equipment.
- Avoid cheap hardware store rope: due to the strong tension already on the rope plus the weight of the rider, zip line ropes must hold many times the rider's weight.
- Purchase a high-speed pulley made for rope. Friction from the ride can quickly overheat pulleys not intended for zip lines.
Writer Bio
Christopher Perkins is a Gold Seal-certified flight instructor and commercial pilot with a Bachelor of Science degree in aviation. He has held FAA certification since 2005, has been writing since 2007, and has a strong background in physics, mathematics and mechanical systems. Perkins writes for eHow, COD, and Answerbag.