One of the handier features of an advanced rifle scope is the rangefinder reticle. This is cross-hair design that assists a shooter in determining a general range to his target using optics alone. With this information, either mechanical or manual adjustments can be made to compensate for bullet drop.
Items you will need
Scope with rangefinder reticle
Targets at preset, defined ranges
Take proper hold of your rifle. All the equipment in the world will not make up for bad technique. Take a firm hold of the grip and trigger with your better hand (usually right), and use your other hand to support the rifle, holding the stock forward of the trigger assembly. Place the rifle butt firmly into your shoulder.
Set the magnification. Rangefinder reticles are designed to work at one magnification setting, and one only. Military scopes typically use x10, but your scope might be different. Check the owner's manual.
Look down into the scope with the eye closest to it. Close your other eye.
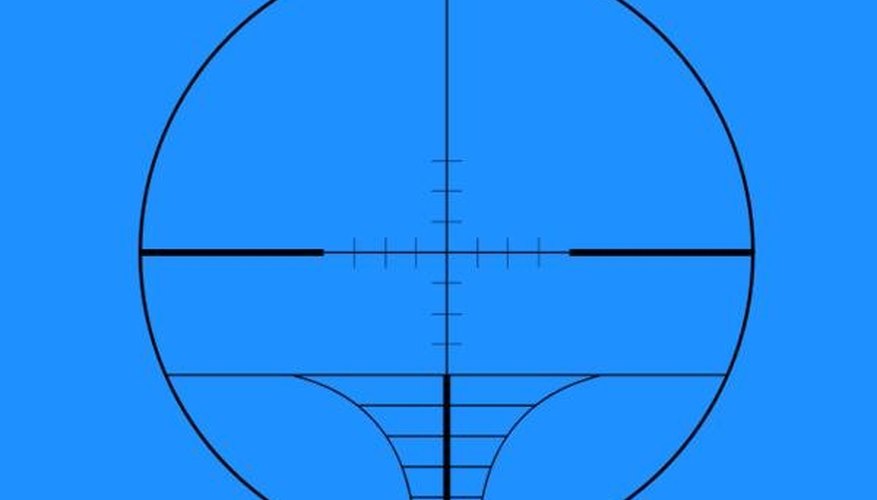
Place an object that you know to be roughly 4 inches tall in the reticle, and measure its height using the reticle's bars. Many scopes use 4 inches as a base measurement, but this may vary with the model. Consult your operator's guide. In the reticle depicted above, you will note a set of bars that runs from the bottom of the reticle through to the center. It includes the blocks on the bottom and the hash marks on the reticle center. Count these bars.
Compare the bars to the range-finding table. For use in the field, this should be memorized. In this example, if the 4-inch object occupies five bars, it is 100 yards away. If it occupies only one bar, it is 500 yards away.
Return to your normal shooting procedures. With the range established, you can adjust the magnification and other settings as desired.


