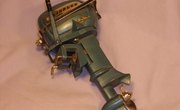
The powerhead of an outboard motor is the equivalent of an automobile's motor. When you remove the powerhead of your outboard motor, it's like removing the engine from your car. And, like the engine of your car, the need for a powerhead repair will dictate the need for removal. The job's complexity varies. For some work, such as piston disassembly, honing and reassembly, even professional outboard technicians will admit the process is best to leave to a machinist.
Items you will need
Phillips screwdriver
Adjustable wrench
Flywheel puller
Wooden kitchen spatula
Step 1
Press the latch on the rear of the top cover, lift it from the motor and set it aside. Remove the mounting screws for the lower cowling with a Phillips screwdriver and remove the cowling. If the motor has a fuel tank or manual starter rope assembly, remove them.
Step 2
Remove the flywheel, using an adjustable wrench and a flywheel puller, and pull off the ignition coil and related ignition components.
Step 3
Unscrew the six bolts from underneath the powerhead-to-gearcase flange. There are three on each side of the motor: one forward, one aft and one toward the center of each side. Lift the powerhead straight up and off the lower unit.
Tips
- If the powerhead is stuck, pry carefully along the edges and use a rubber mallet to help break the gasket seal or corrosive adhesion. Remove and discard the gasket from the mating surfaces. Scrape any remaining gasket free of the mating surfaces with a wooden kitchen spatula.
References
- "Johnson Repair Manual -- 2.5 to 250 HP Models, 2002-2007"; Seloc Marine; 2007
Tips
- If the powerhead is stuck, pry carefully along the edges and use a rubber mallet to help break the gasket seal or corrosive adhesion. Remove and discard the gasket from the mating surfaces. Scrape any remaining gasket free of the mating surfaces with a wooden kitchen spatula.
Writer Bio
Will Charpentier is a writer who specializes in boating and maritime subjects. A retired ship captain, Charpentier holds a doctorate in applied ocean science and engineering. He is also a certified marine technician and the author of a popular text on writing local history.


