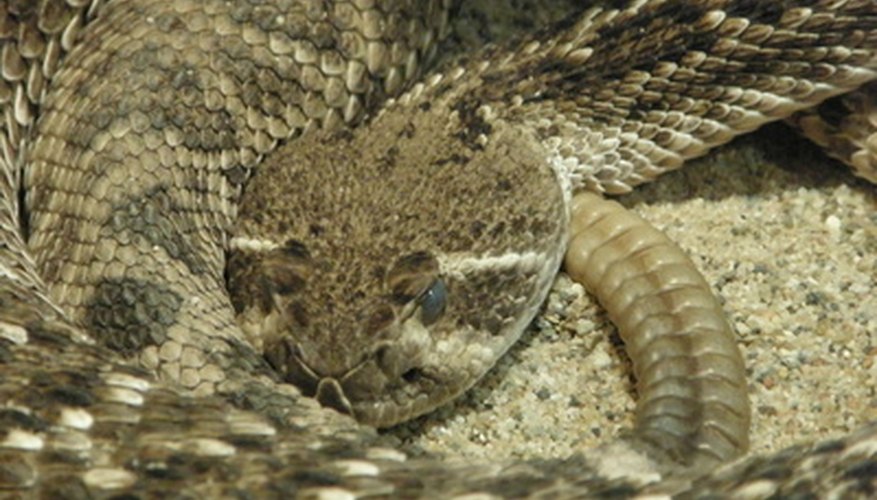
You may have seen them in one of the roadside tourist shops in Florida, Texas or any number of other states. Perhaps you were coming around the corner, browsing the snow globes and other knickknacks, when you saw the raised face of a rattlesnake ready to strike. Luckily, this wasn't a lost reptile looking for food, it was a stuffed, very dead rattlesnake. Taxidermy for most small animals is a process that is more about detail than it is about speed. A stuffed rattlesnake sells in those stores, or else they wouldn't carry them--and someone has to stuff them.
Skinning and De-Fleshing the Snake
Kill the rattlesnake. It's pretty obvious that you don't want to try to stuff a live poisonous reptile. But even seemingly dead rattlesnakes can produce venom. One easy way to ensure that the rattler is dead is to put it in a freezer for seven days to let it freeze solid. Be sure to leave it for seven days--people have been bitten by rattlers that were in the freezer for just a day or two.
Thaw out the snake in your refrigerator for a day and let the outer skin get loose. Note where you put the snake and leave the door shut. If you open it and the snake is in a different spot, you should put it back in the freezer. If it hasn't moved, you are ready to begin.
Measure the length and width of the head using the measuring tape. You must use these measurements to order your snake head mold. If the mold is too big, you will stretch the skin; if it's too small, the skin will bunch up or hang down.
Pull the fangs and teeth from the mouth using vice grips. Taxidermists disagree on the best time for this step, but because a dead snake with fangs can still bite, sooner is always better than later. Use caution here, as some of the venom may have thawed and can remain deadly for years.
Cut the skin loose beginning at the snake's anus. This will be the vent-looking slit in the snake's tail. Use manicure scissors and cut an even split, first working down from the vent to the rattle and then working upward toward the neck. Loosen the skin around the vent and work your fingers around, separating the meat from the skin. Use caution so you don't tear the skin.
Cut the upper lip loose from the snake head. Cut the lower jaw skin and then through the cartilage on the nose. Cut the skin around both eyes loose so that you can separate the nose, jaw and lips from the skull. Scrape the lower jaw, the lip line and the nose area to remove the flesh from the skin. Lift the skin from the head area. Remove any excess flesh from the skin.
Set the meat aside in a bowl of ice water and salt. The rattlesnake meat can be used for food and is considered a delicacy in many areas.
Tanning the Hide
Pin the skin to a long board with small nails or pins. Do not stretch the skin. Start in the center of the skin and the board and pin the outer edges flat. Work your way up the sides of the skin until the entire length of the skin is secured to the board.
Dry the skin for about 10 hours and apply a generous coat of tanning oil using a new paintbrush. Let the coat dry for 10 hours, remove the pins, flip the skin over and apply another generous coat of tanning oil. At this point, the skin should not curl. If it does, flatten it out again with the pins.
Set two sheets of paper towel over the length of the skin and gently set a flat board on top of the board the skin is on. Let this sit for about an hour and then remove the top board and paper towels. Lightly brush with the grain of the scales to remove the scale covers.
Mounting the Snake
Dead rattlesnake
Freezer
Vice grips
Measuring tape
Manicure scissors
Needle-nose pliers
Two flat boards
Pins
Paper towel
Paintbrush
Tanning fluid
1/8-inch gauge wire
Super glue
Drill
Critter Clay
Vermiculite
Spiderwire fishing line
Tanning oil is made with 1 part Formaldehyde, 8 parts glycerin and 4 parts rubbing alcohol.
Rinse the skin in a relaxer before mounting it to prevent drying.
Cut a 1/8-inch gauge wire to the exact length of your snake. Twist the wire into the pose in which you wish the snake to be mounted. Insert the back of the foam head onto the wire and secure it with some super glue.
Cut off a small portion of the rattlesnake nose on the foam head. The cartilage from the actual nose should still be on the skin. Drill small holes into the foam head for the pits. Slide the skin over the foam head and position the glass eyes so that the pupils are vertical. Using a small amount of Critter Clay behind the eyes on the foam head will help hold them in place. Adjust the lip line and eye area with the rest of the head.
Fill the skin cavity with vermiculite. As you move your way up from the tail, sew up the split in the skin with some Spiderwire fishing line. Massage the vermiculite into the body of the snake gently and pack it in. At this point the body should be still a little flexible. Mount it in the desired pose and use glue to secure it.
Items you will need
Tips
References
Tips
- Tanning oil is made with 1 part Formaldehyde, 8 parts glycerin and 4 parts rubbing alcohol.
Writer Bio
David Roberts has been writing since 1985. He has published for various websites including online business news publications. He has over 11 years experience in tax preparation and small business consultation. He is also a Certified Fraud Examiner. He received a Master of Business Administration from Florida Metropolitan University in 2005.


