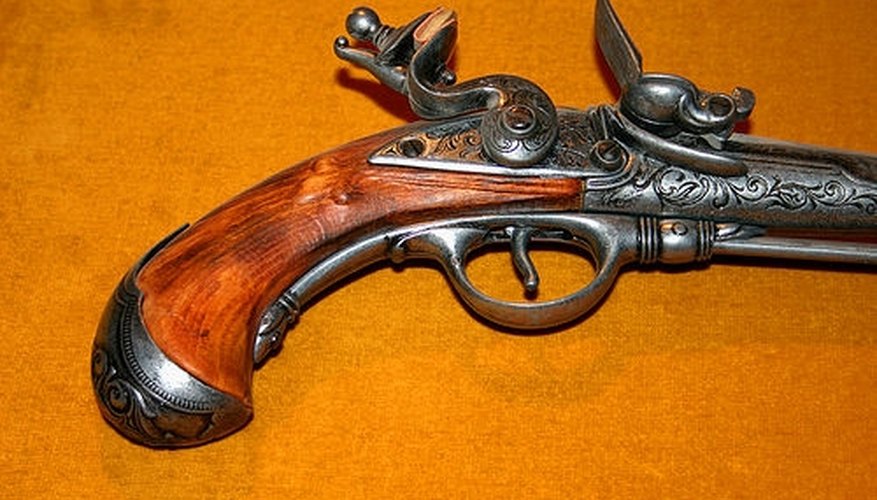


Making your own pistol grips can turn your standard factor issue pistol into a truly one of a kind treasure. It will allow you to have a customized look with your choice of wood and ornamentation. Most importantly, it will allow you to customize the fit of your pistol grips, to a degree, by scaling up the size for larger hands of reducing the size for smaller hands. It does take a lot of patience and work, and can be challenging to get done right on your first attempt, but the finished product is very rewarding and will give you an elated since of accomplishment. Here is how to make your own pistol grips at home.
Items you will need
A pistol
Wood for carving
Jigsaw or coping saw
Hammer
Nail punch
File
Sandpaper (220 Grit)
C-clamp
Work bench/table
Drill press (or drill)
5/32 drill bit
1/8 drill bit
Choose the wood that you want to work with for your pistol grips. The type of wood is really up to your personal preference. Cocobolo, cherry and mahogany are all popular choices for pistol grips. Any block of wood will work though, as long as it is at least 5/8 inches thick and has at least one side that is flat and reasonably smooth. If your wood is mostly flat and smooth, you can always improve it’s quality by using a wood plane and a little sandpaper.
Use your original grips to trace a pattern. Simply set them on to of the wood you have chosen and use a pencil to trace an outline of the grips. If your wood is dark, you may wish to use a silver or white pencil. It is OK to leave additional space around the outside rather than trying to get an exact fit. You will be trimming this down later, and it is better to have surplus material to work with than to not have enough. If your original grips are not available for some reason, simply lay the handle of your pistol onto the block of wood and trace an outline around it, then flip it over and trace an outline from the other side.
Cut out the pattern that you traced onto the wood. It is important to use a saw that is designed to make sharp turns, because there will probably be some hard angles that would be difficult to cut with most saws. If you have a wood shop available, then use your jigsaw to cut out the pattern. If not, then go to the local hardware store and purchase a hand held coping saw. A saber saw will also perform well for this job, but not as well as a jigsaw.
Use a hammer and nail punch to knock the roll pin out of the grip frame on the pistol. Simply place the punch on the roll pin, and then lightly tap the punch with the hammer. The roll pin should come out with every little difficulty. Be careful to not strike so hard that you damage the roll pin, and take care to keep it in a place where it will not be lost, as you will need it when it is time to assemble your pistol with the new grips.
Begin making a rough fit for your pistol grips. Position the grips against the pistol grip frame. You will notice that they do not quite fit where the gusset is at. Use your file to file a notch out of your grips in the spot where the bumps against the gusset of the grip frame. Take your time and slowly file that section down until the grips will fit flat against the grip frame. Make sure you have a fit that’s good and tight, because this is the earliest point at which you determine the final resting position of the pistol grips.
Use a C-clamp to hold one side of the grip in position on the C-clamp, and drill the hold for the roller pin that you removed in Step 4. Attach a 5/32 drill bit into your drill press. If you do not have a drill press you can use a standard hand held drill, but be particularly careful to not drill an angled hole. Drill through the roll pin hole on the pistol’s grip frame into the pistol grip you are making. Do not drill all the way through the wood! You do not want to drill any deeper than 3/16 inches. Afterwards, remove the C-clamp and use it to position the other pistol grip in place, and repeat the process so that you have matching roller pin holes in each of the pistol grips.
Replace the roll pin into the grip frame of the pistol. You may require the assistance of the hammer and nail punch in order to get it in. Once it is in place, put one half of the pistol grips on the frame and use your pencil to mark off the excess wood that is on the butt of the pistol grip, at the bottom. Then do the same thing with the other half of the grips. You will need to clearly mark this line so it can be used when you make your rough cuts for the butt of the pistol grips.
Cut off the extra wood at the butt of the gun. Starting at the line you measured in the previous step, trim off the excess wood, ideally making a cut at around a 60-degree angle, leaning from the line to the top of the pistol grip. You can then use a mild sandpaper (220 grit is perfect) to smooth off the edges of your cut. You may also opt to make this cut without cutting an angle. It is just a matter of personal preference.
Drill the holes for the screw hole on the pistol grips. Start by using your C-clamp to position one of the pistol grips to the grip frame on the pistol. Using your pistols original grips as a guide, mark a place on the grip that will not interfere with any springs or other hardware that may be present inside the grip frame. Insert a 1/8 drill bit into your drill or drill press, and drill a hole all the way the pistol grip. Remove the grip from the pistol and clamp it to the other grip. Re-drill through the hole, and continue all the way through the grip on the other side, resulting in one hole that travels all the way through both grips.
Trim excess edges from the grips. Take the grips one at a time and hold them firmly against the grip frame while you use your pencil to trace a line across any edges that overlap the grip frame. Although you trimmed the butt of the grips earlier, you will still need to trim the top side and the under side of the grips during this step. After the line is measured, cut the wood all the way up to the line, but not over it. Don’t worry, there is still more work to come that will refine this edge a little.
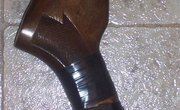
Take down the blocky shape of the grips. To do this, you will first need to measure the arc of the grips. It is a good idea to use the original grips as a guide, but if you require bigger or smaller grips than what were originally on the pistol, you will need to make those changes at this time. To measure the arc, just draw a line across the high point of the arc and mark the thickness that you want on the front, then simply draw a line to connect the two. This is actually a lot less difficult than it sounds. Since a photo speaks a thousand words, refer to the photo illustration of this cut that is on Tony Tinhorn’s page in the Resources section below.
Everything should be starting to look a little more like a set of pistol grips now. Let’s improve on that. The best thing to do at this stage is to smooth out those edges so that everything looks more smooth and fluid rather than blocky. Use a hand held belt sander, disc sander, drimel tool or drum sander to make short work of this job, finishing it off with a really fine grit sandpaper. You do not have to get the size exactly perfect at this stage, but they should be very close and you should see the size of the grips begin to decrease as you sand them into shape.
Install the escutcheons into your pistol grips. These small pieces of hardware are essentially small brass fittings that are in place to prevent your screw from cracking or damaging the wood. Plus they provide a more professional appearance overall. One of the escutcheons is threaded, and the other has a hole for the screw to slide through. All you really need to do is press the escutcheons into place. They should fit very snugly into the screw hole that you drilled. If you are concerned that they may be too loose fitting, a little wood glue will secure them a little tighter.
Place the grips onto the pistol’s grip frame and tighten the screw through the escutcheons. Look everything over carefully to make sure everything fits well. If you spot any areas where the wood is still overlapping the grip frame, mark it with your pencil, then remove the grips, sand down to the line, replace the grips and look again. Repeat as many times as are necessary to have a perfect fit all the way around the grips.
Decide on what kind of finish you want to apply to your pistol grips. There are a large number of choices available for the finish on your grips. Any finish you can apply to wood is available to use on your grips. You can apply oils, varnish, wood stains, clear coating or any other form of finish you desire.
Tips
- Always remove the grips from the grip frame before you do any kind of cutting, sanding or filing, or you may damage the blue on the metal and make your pistol susceptible to rust.
Tips
- Always remove the grips from the grip frame before you do any kind of cutting, sanding or filing, or you may damage the blue on the metal and make your pistol susceptible to rust.
Writer Bio
Jerry Garner has been writing semi-professionally for more than 15 years. The body of Garner's work includes informative articles, news and current events and historical essays. He is an avid sports fan and frequently writes about outdoor activities online.