Adding a canopy to an open boat can be an expensive project--or not. With some PVC pipe from the hardware store, some Velcro and some #3 canvas, any open boat can have a pleasant canopy under which the boater may enjoy the view, the breeze and shade from the noonday sun. Acting much like an awning over a patio, the boat's canopy is attached to its frame with Velcro and can be quickly removed as needed for other sporting activities.
Items you will need
1.5-inch PVC pipe
2-inch PVC pipe
Four 1.5-inch PVC elbow fittings
Four 1.5-inch PVC T fittings
3 canvas, waterproof
Two-part epoxy glue
PVC pipe cleaning fluid
PVC pipe adhesive
Four screws (slotted)
Screwdriver (slotted head)
One roll of Velcro tape
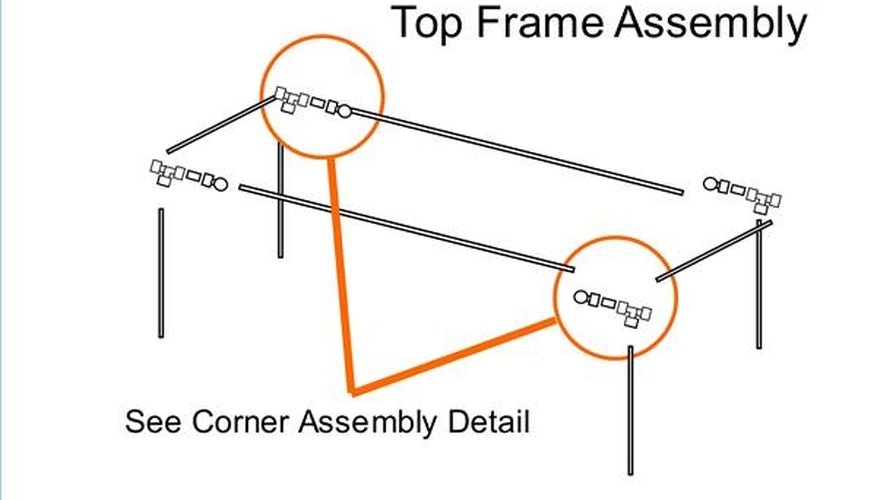
General layout of a canopy frame
Determine the size and configuration of the canopy. Will it enclose just the back deck? Will it cover the entire open space of the boat? Once these decisions have been made, take the measurements of the space that you wish to cover. These will be the dimensions of the frame to hold the canopy.
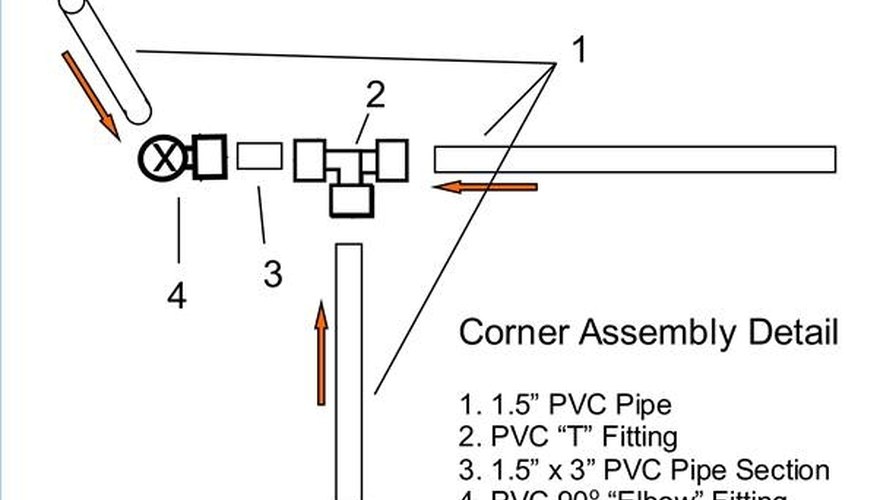
Detail of assembling the corners of the canopy frame
Lay out the frame and measure the PVC pipe before cutting, remembering that the old saying, "Measure twice and cut once," applies very much to this type of project. Cut and assemble the frame. Determine how well the cabin fits in the boat and make adjustments before gluing the frame together.
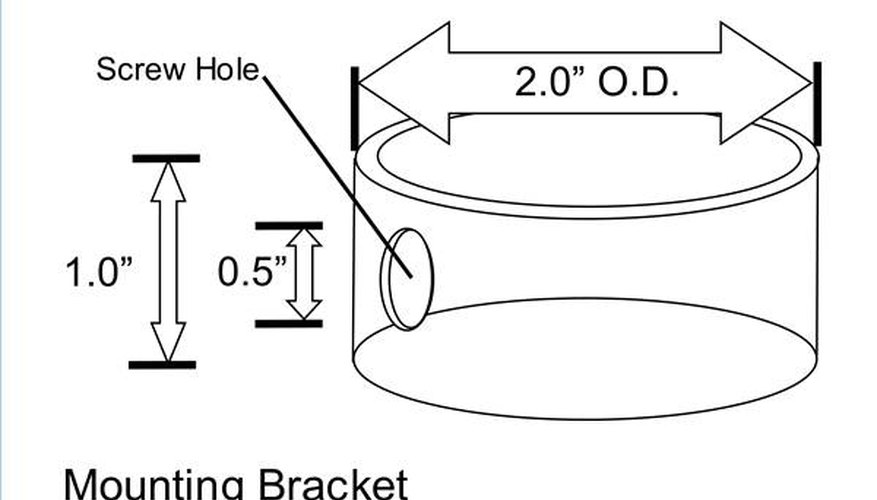
Mounting bracket for canopy frame
Drill 1/2-inch holes into the 2-inch PVC pipe segments as shown. The mounting brackets should be at least 1-inch in height. Assemble the frame and place the frame into the boat at the desired position. Mark the locations of the legs on the deck and remove the frame. Using two-part epoxy glue, glue the 2-inch PVC pipe segments--the mounting brackets for the frame--into place and allow the epoxy to cure completely. When the epoxy has cured, slip the legs of the frames into the mounting segments and secure with screws.
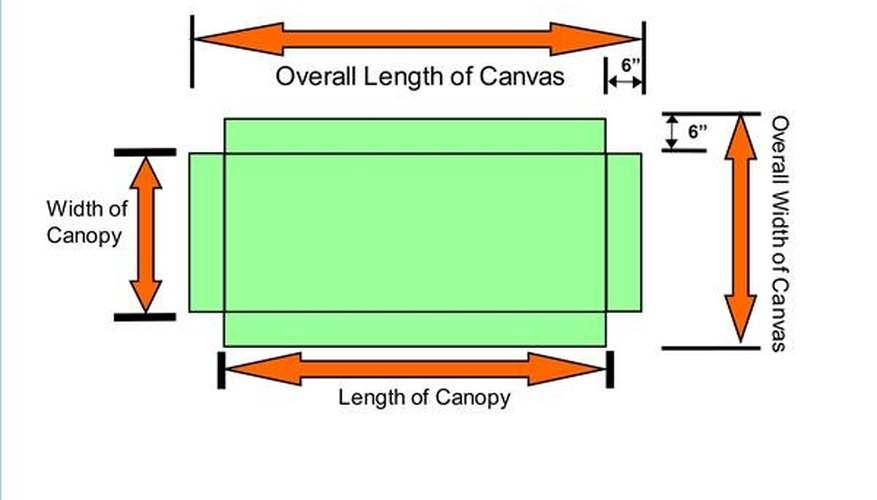
Sizing the canvas
The top of the supporting framework will be the size of the canopy. However, since the canvas will lap over the sides of the framework slightly, it will be necessary to measure and cut the canvas 1 foot larger--both in length and width--than the frame. Lay the canvas out on a flat surface and, using a carpenter's square, mark 6-inch x 6-inch squares on the corners of the canvas.
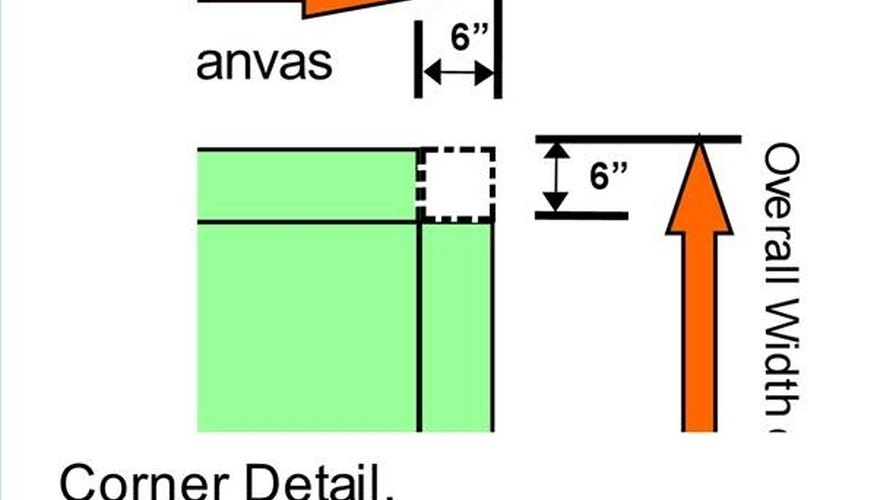
Trimming the canvas
With scissors, trim the 6-inch x 6-inch squares from the corners of the canvas, then turn a 1/4-inch hem on all edges of the canvas. A treadle sewing machine will make quick work of this, but an electric sewing machine may struggle with the canvas. This will leave a small gap at the corners of the finished canopy, which will minimize the upward force of wind coming through the canopied area.
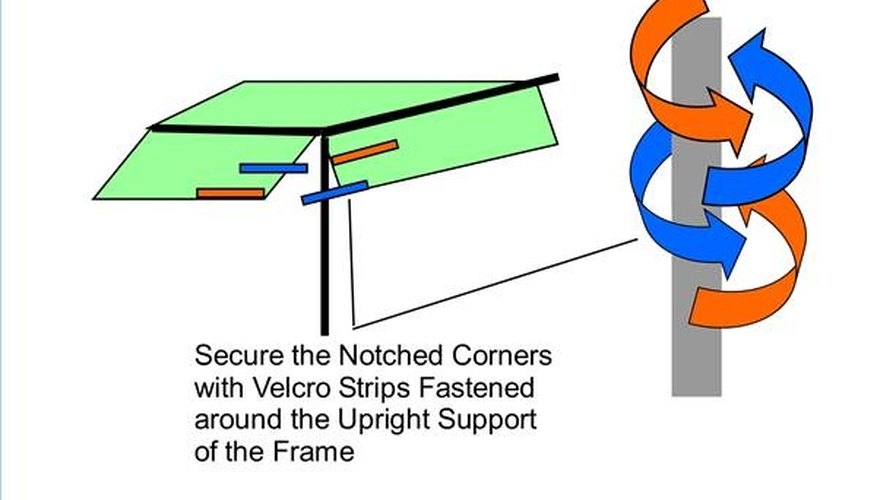
Closing the corners and securing the canopy with Velcro strips
Lay the canopy over the frame so that the notched corners are at the corners of the framework and the canvas forms a small overhand, equal on all sides. Attach two Velcro strips to the notched corners as shown, one on the the inside and one on the outside of the canopy. Fastening the bottom Velcro strip behind the upright of the frame, and the to strip outside of the frame as shown will secure the canopy in light winds. For more moderate winds, additional Velcro strips should be added to secure the canvas to the upper rails of the frame.
Warnings
- This project involves sewing. Take the normal precautions for sewing safety. This project involves work with power tools and harsh chemicals. Read and observe the precautions on the PVC glue and adhesive and the epoxy.
Tips
- It may be helpful to use wooden shims between the mounting brackets and the legs, to keep the canopy frame from wobbling in the wind.
Tips
- It may be helpful to use wooden shims between the mounting brackets and the legs, to keep the canopy frame from wobbling in the wind.
Warnings
- This project involves sewing. Take the normal precautions for sewing safety. This project involves work with power tools and harsh chemicals. Read and observe the precautions on the PVC glue and adhesive and the epoxy.
Writer Bio
Will Charpentier is a writer who specializes in boating and maritime subjects. A retired ship captain, Charpentier holds a doctorate in applied ocean science and engineering. He is also a certified marine technician and the author of a popular text on writing local history.


