


When autumn begins to warn that the boating season is drawing to an end, your thoughts probably turn to winterizing your boat and protecting it from the elements. Boat storage yards are expensive, while a regular cover will keep out rain, but it won't shed leaves or snow. That's why winter covers are oversize and have a frame like a tent. Making your own frame for your boat's winter cover will save you money now and work at the beginning of fitting out season.
Items you will need
Measuring tape
PVC pipe
PVC tee fittings
90-degree PVC elbow fittings
PVC cement
PVC "purple primer"
Hacksaw or PVC pipe cutter
Yellow china marker ("grease pencil")
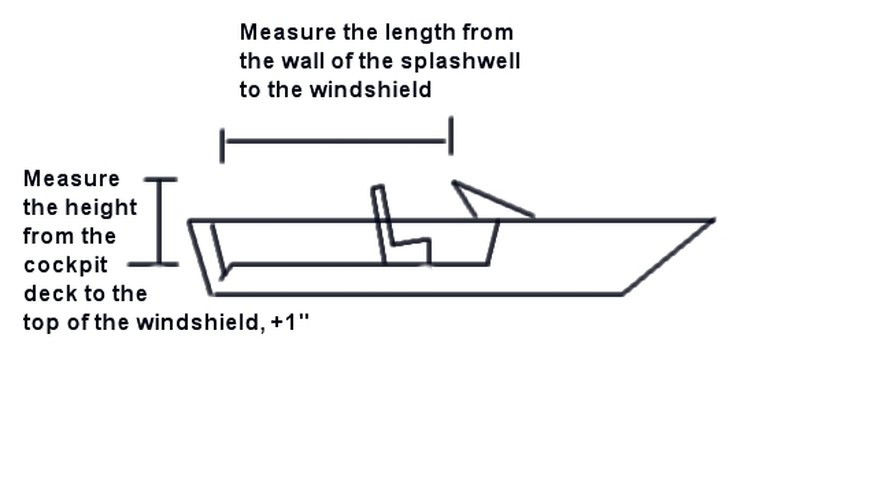
Measure the length of your boat with the measuring tape, from the inside of the splash well (where the gas tank is located) wall or the transom, to the windshield. This will be the length of the ridge support and the longest piece of PVC pipe you will need to cut. With the measuring tape, measure from the deck in the cockpit to the top of the windshield. Add 1 inch to this measurement. This will be the height of the vertical supports, the second longest pieces of PVC you will need to cut: cutting the longest pieces of PVC pipe first will allow you to use more of the pipe.
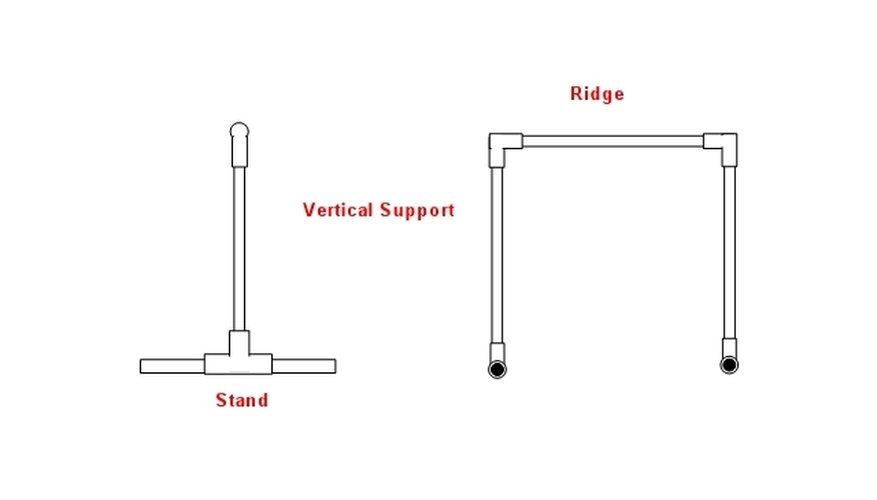
PVC layout for a winter boat cover frame
Cut the PVC pipe with the hacksaw or PVC pipe cutter in the order in which you measured it: ridge support then vertical supports. You will also need to cut four 18- inch segments of PVC pipe--the shortest segments of pipe needed--to make the stands for the vertical supports.
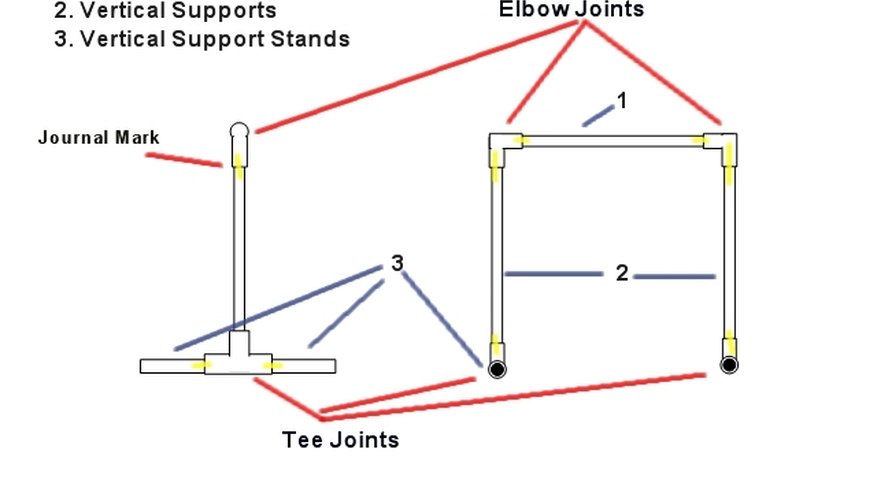
Pipe segments and elbows, fitted and marked with journal marks
Dry fit the PVC pipe segments together. Insert the four 18-inch segments into the horizontal run of the tee fittings. Insert the vertical supports into the vertical outlet of the tee fittings. Insert the ridge support into the 90-degree elbow fittings so that both elbows point the same way. Install the ridge support by sliding one vertical support at a time into the elbow fittings on the ends of the ridge support. Make sure the stands for the vertical supports are perpendicular to the ridge support. Set the frame into your boat and make any adjustments necessary.
Use the china marker to draw a line over each joint fitting and along each piece of PVC pipe inserted into the fitting. These lines will act as "journal marks," to help you align the pieces as you glue them together. After you draw journal marks on the PVC, disassemble the frame. Paint the inside of each 90-degree elbow fitting and tee fitting, and the ends of each piece of pipe with PVC purple primer and allow the primer to dry completely.
Assemble the frame one joint at a time by swabbing the inside of a fitting with PVC cement, swabbing the end of the pipe segment that goes into that fitting with PVC cement, pushing the PVC pipe segment into the joint and twisting the pipe slightly in the joint until the yellow journal marks are aligned.