


Outboard motors are popular among motorboat enthusiasts because they are fuel efficient, easy to maintain and virtually problem-free. However, there are parts, such as the water pump, that will need to be replaced due to normal wear and tear. Water pumps keep the engine internals cool by circulating water through channels in each of the engine's components, which transfers heat away from the vital internal components. As water pumps are constantly running when the motor is running, it is common for these particular parts to wear out just from use. However, replacing the water pump is a fairly simple process and can be completed by even a novice mechanic.
Items you will need
Water pump kit
Hand tools
Motor stand
Motor oil
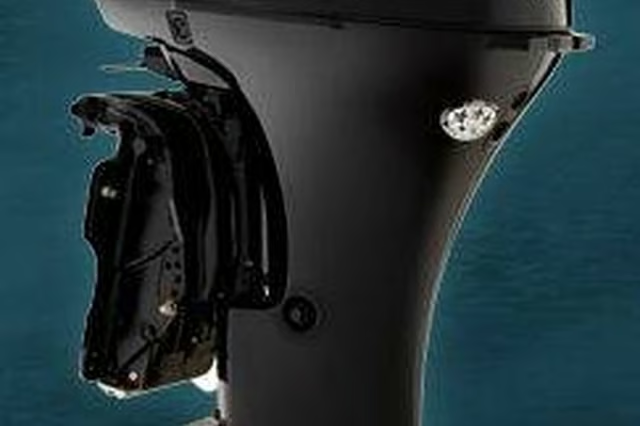
Locate the bolts holding the lower motor housing to the upper motor housing on your Mercury motor. There should be about five total, four easily visible on the bottom of the housing, with a fifth located under the small metal cap at the base of the prop tail. Remove the bolts and store them somewhere you can easily find them later.
Pull the entire lower motor housing away from the upper housing with the help of a friend. Pull slowly and remember to disconnect the wiring connections located within the upper housing before pulling the two housings completely apart. Place the bottom housing firmly in the motor stand.
Locate and remove the four screws holding the impeller housing onto the lower motor housing. Slide the impeller housing up over the driveshaft and pull the impeller out of the housing to examine it. If the impeller blades do not spring back into position easily or show wear and cracks in the rubber, you will need to replace it with the new impeller from your water pump kit.
Remove the gaskets from the impeller housing. There will be three working in unison: rubber, metal, rubber. Put a small dab of motor oil on the rim of the impeller housing and on each of the gaskets. Slide the impeller over the driveshaft, followed by the impeller housing.
While a helper pushes down on the housing, turn the driveshaft clockwise to turn the impeller blades in the correct direction and slide the housing down over the impeller itself. Slide the lower motor housing back into place on the upper motor housing, connect the wiring, and replace the mounting bolts to mount the two housings back together. Take your boat out for a test drive!