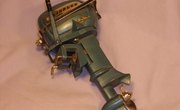
Winterizing a Yamaha four-stroke four-cycle outboard motor isn't nearly as much trouble as keeping a New Year's' resolution and, if done properly, it ensures that your motor will be ready for the next boating season with a minimum of fuss, muss and bother. A winterization session is much like a visit to a spa for outboards: The motor will have enjoyed a fresh-water flush and find itself full of oil, both in the crankcase and in the gear case. It will have had a full fuel stabilization treatment and a fogging, and even its plugs will have had some TLC.
Items you will need
Fuel stabilizer
7/16-inch wrench
Oil drain pan
Torque wrench
Garden hose
Fogging oil
Moisture-excluding spray lubricant
Gear case lubricant
Automotive paste wax
Clean cloth
Orbital buffer
Add fuel stabilizer to the tank before your last outing and, when your outing is over, fill the tank again and add one ounce of stabilizer for each gallon of fuel you added.
Remove the 7/16-inch crankcase drain bolt on the starboard side of the "leg" and drain the crankcase oil into an oil drain pan. Replace the oil and screw the crankcase drain bolt back into place with a torque wrench.
Attach a garden hose to the engine's fresh water flush connection. Remove the motor cover and the air intake filter/silencer cover. Turn the water on full pressure and start the motor.
Allow the engine to run for about 15 minutes, to increase its temperature to the operating level. Spray fogging oil into the carburetor and, when the engine is producing heavy, bluish-black smoke, shut the motor off, turn the water off, and disconnect the hose
Replace the air intake filter/silencer and remove the spark plugs. Spray fogging oil into the holes, grease the threads of the spark plugs, put the plugs back in and torque them to the level specified for the model. Take the safety lanyard out of its clip on the throttle control and "bump" the engine with the starter to circulate the fogging oil.
Turn off the valve to the fuel tank. Open the screw on the bottom of the vapor separator tank and drain any remaining fuel. Disconnect the vent hose and bump the engine once more to push the last of the fuel out of the separator tank.
Spray a moisture-excluding spray lubricant over the exterior of the engine, replace the engine cover, and tilt the motor upward. Place a drain pan beneath the gear case, unscrew the vent plug on the starboard side of the lower unit with a screwdriver, just above the gear case, and unscrew the drain plug from the bottom of the gear case.
Allow the gear case lubricant to drain completely. Replace the gear case lubricant through the drain plug hole. Reinstall the vent plug and drain plug.
Apply automotive paste wax to the motor cover with a clean cloth. Allow the wax to dry to a white film and buff with an orbital buffer.
Warnings
- If you work on your Yamaha outboard when your boat is on its trailer, or your motor is on a storage stand, remove the propeller: pull the cotter pin from the propeller nut, remove the propeller nut with a wrench and slide the thrust hub, propeller and washers from the propeller shaft. Failure to remove a propeller before operating an outboard out of the water is an invitation to a propeller strike injury, which can maim or kill.
Writer Bio
Will Charpentier is a writer who specializes in boating and maritime subjects. A retired ship captain, Charpentier holds a doctorate in applied ocean science and engineering. He is also a certified marine technician and the author of a popular text on writing local history.


