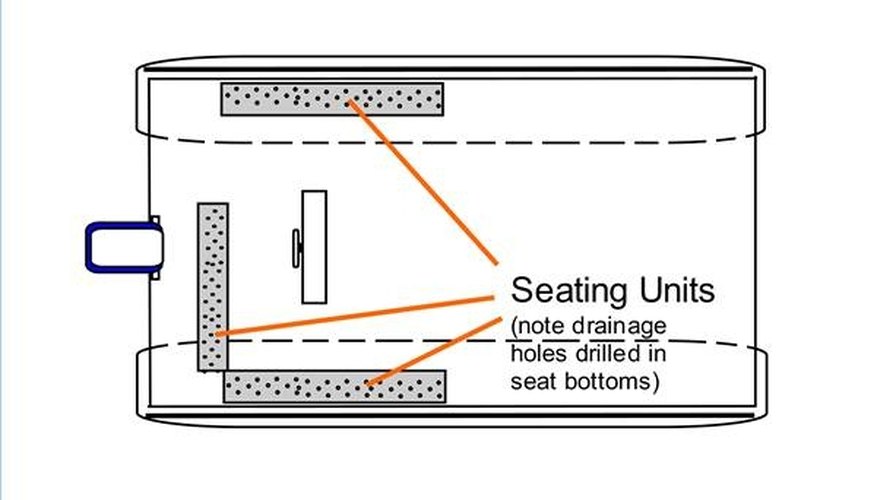


A pontoon boat's deck is a big, flat, open area waiting to be filled with friends and toys. For the do-it-yourself boat owner, this means seating for those friends and storage for those toys can be combined in a single unit, where the seats have compartments below to store water toys and gear that would otherwise be underfoot when underway.
Items you will need
Lumber, 2x2 inch, sufficient to construct deck-mounting frames attached to front and back seat fascia
Plywood, marine, cut to pattern shown for seating unit side and supporting panels, on 24-inch center-to center intervals
Plywood, marine, sufficient to make front and back fascias and top rail
Basic hand tools for carpentry, including a circular saw
Wood screws
2 vinyl cushions, marine, with Velcro lashing ties to secure the cushions to the seating unit
Silicone caulk
Marine acrylic paint
Brass hinges for hinged seat
Step 1
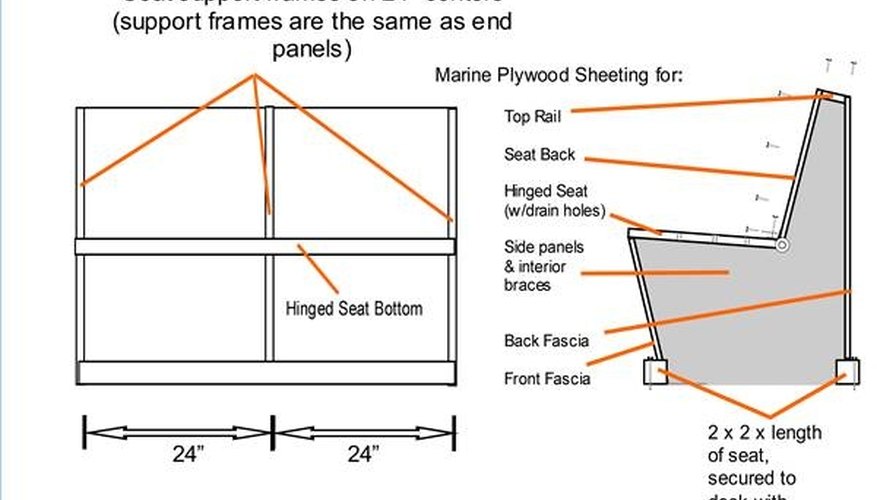
Seat component layout and possible side/interior panel pattern
Cut the side panels for the seating units from marine plywood sheets using the circular saw. The exact dimensions of the seating units are left to the boat owner, since the boat owner is the only person who can determine the size, number and location of the seating units. The side panels and interior supports for the seats are cut from the same pattern. Note that in the illustration, the 2x2 seat mounting brackets are set into notches in the side and interior support panels for added security and stability of the unit.
Step 2
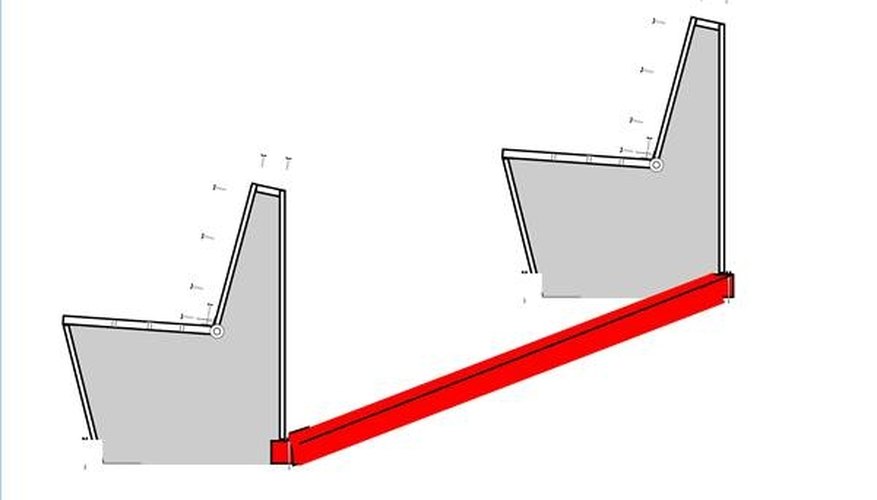
Positioning the rear mounting bracket and side panels
Cut the 2x2 front and rear mounting brackets to length. Paint the side panels and 2x2 mounting brackets and allow to dry thoroughly. Position the 2x2 mounting brackets that will be on the back side of the seat on the boat's deck and check for fit and placement before fastening the 2x2s to the deck. Then, position the side panels (2 per unit) at the ends of the mounting brackets and secure in place with screws.
Step 3
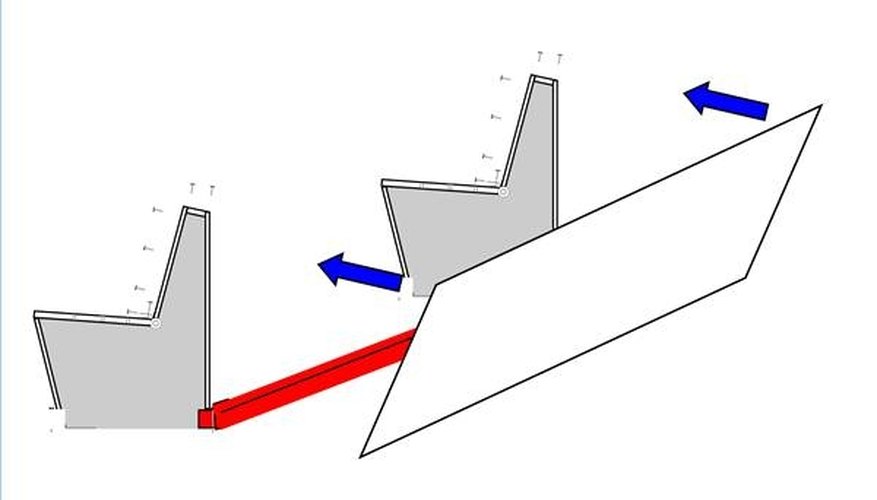
Installing the back fascia
Cut the back fascia to the desired size, paint the fascia and allow to dry completely. After the side panels are attached to the rear mounting bracket, attach the back fascia (the back panel of the unit) to the end panel with screws. Caulk all joints with the silicone caulk.
Step 4
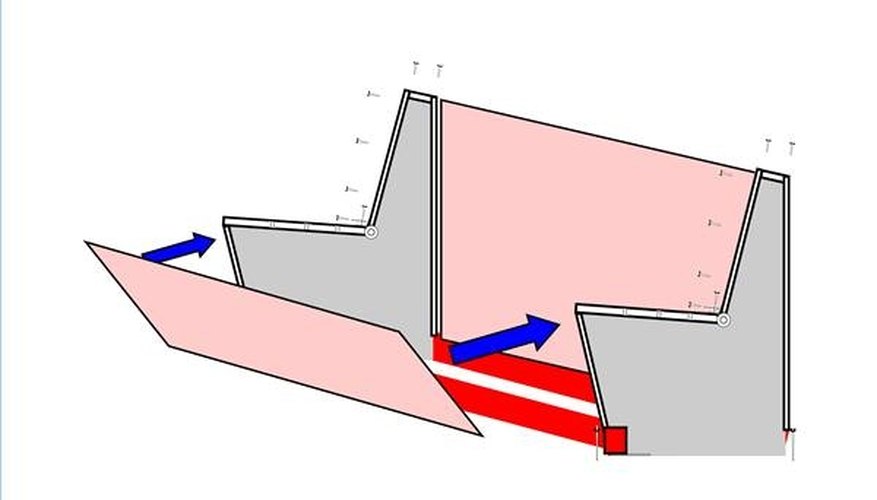
Installing the front fascia
Cut the front fascia, the seat, the seat back and the top rail to the desired size, caulk, paint and allow to dry completely. Slip the front mounting bracket into the notches on the front of the side panels and attach to the deck. Attach the front fascia to the side panels as shown.
Step 5
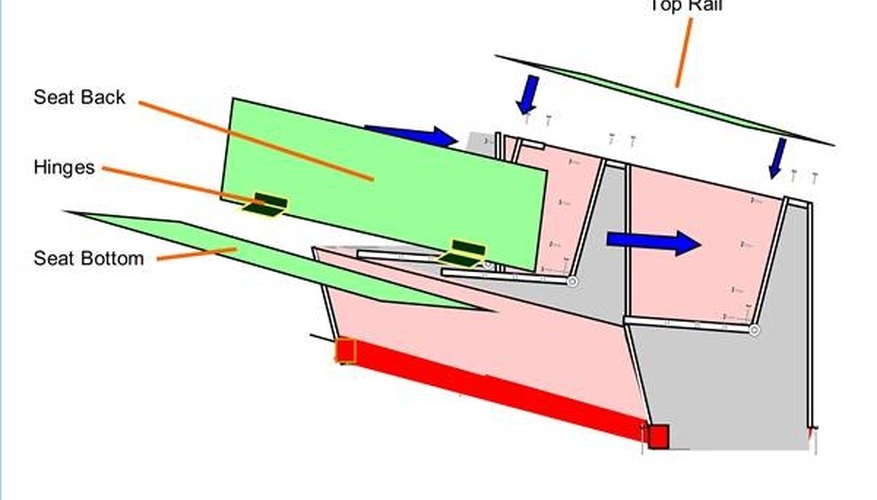
Final assembly
Install the interior supports, attaching them to the front and rear mounts and to the back fascia. Install the hinge on the back panel. Install the back panel and top rail. Set the seat panel in place and attach the hinges to the top of the seat panel. Caulk all the joints with silicone caulk and allow the caulk to cure completely. Add cushions and enjoy.
Warnings
- Remember the Carpenter's Adage: measure twice, cut once.
Tips
- While seating on most boats is set across the beam, facing forward, seating along the side rails can help prevent queasy stomachs from being overcome by the normal motions of the boat.
Tips
- While seating on most boats is set across the beam, facing forward, seating along the side rails can help prevent queasy stomachs from being overcome by the normal motions of the boat.
Warnings
- Remember the Carpenter's Adage: measure twice, cut once.
Writer Bio
Will Charpentier is a writer who specializes in boating and maritime subjects. A retired ship captain, Charpentier holds a doctorate in applied ocean science and engineering. He is also a certified marine technician and the author of a popular text on writing local history.