


Building a rope bridge, with or without wood cross pieces, requires just a few basic knots. However, these knots require practice to make them well and quickly. A good knot is easy to tie, stays tied when in use, and can be untied easily when its use is completed. These basic knots used for rope bridges are standards that meet this test. Practice with smaller pieces of string or thin rope until you get the technique down. Nylon rope about 1/4-inches in diameter works well for practice since it is easy to untie.
Items you will need
1-inch natural fiber rope
1/4-inch braided nylon or polyester rope
2 strong anchors for each side of the bridge
Attach the bridge with a timber hitch. The timber hitch is a knot used to secure a rope to a tree, and is also the starting knot for diagonal lashing. The timber hitch or the taut-line hitch may be used to attach the rope bridge to the supports. To tie a timber hitch, bring the end of the rope around the log or spar. Take the end of the rope around the main part of rope so that it circles around the spar or support and hooks to itself. Wrap the end of the rope around the circle of rope that is around the support four or five times. Pull on the long end of the rope to tighten. Keep the rope taught to maintain the knot.
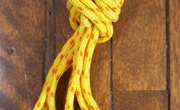
Tie cross rails with a clove hitch. The clove hitch is used to secure the wood cross rails on a rope bridge, and any place in the bridge where a line must be held to a post when it is being pulled taut from two directions. First, bring the end of the rope over and around the spar or cross rail. Bring it around the rail and to the left of the main part of the rope. Cross the end over the main part of the rope and wrap it around the support to the right of the first loop. As you bring the rope up, tuck it under the second loop and pull it tightly.
Use two half hitches or a double half hitch on guidelines. A two half hitch knot bears a great deal of strain and is ideal for tying a rope to a standing post, tree or ring. It is quick to tie and will hold tightly without getting loose even with smooth sticks and a great deal of strain. To form the knot, run the end of the rope through the ring or around the post and hold the main part of the rope taut. Wrap the end over the main piece of rope, then bring the end through the loop you just formed. Now take the end under the main part of the rope, then down into the loop just formed by wrapping the end. Tighten.
Tie a sheet bend to extend ropes. The sheet bend is an ideal knot for attaching two pieces of rope for added length. It's especially useful for ropes of differing sizes, and holds the ropes together under pressure. To make the knot, make a bend near the end of one piece of rope. Hold both sides of the bend together. Run the end of the second rope up through the bend. Wrap it around the two pieces forming the ends of the loop. As you bring the end around the two pieces, catch the end under the main part of the second rope just as it comes out of the bend. Tighten.
Warnings
- Test the bridge carefully before sending anyone across it, especially if you have constructed it over a gully or creek.
Tips
- Look at diagrams as you make the knots, and practice them repeatedly before constructing a bridge. Although they seem clumsy at first and may not tighten properly, with practice all of these knots are simple to make.
- For your first rope bridge, construct it over flat ground rather than over a ravine or gully for easier construction and safer testing.
Warnings
- Test the bridge carefully before sending anyone across it, especially if you have constructed it over a gully or creek.
Writer Bio
Rachel Murdock published her first article in "The Asheville Citizen Times" in 1982. Her work has been published in the "American Fork Citizen" and "Cincinnati Enquirer" as well as on corporate websites and in other online publications. She earned a Bachelor of Arts in journalism at Brigham Young University and a Master of Arts in mass communication at Miami University of Ohio.