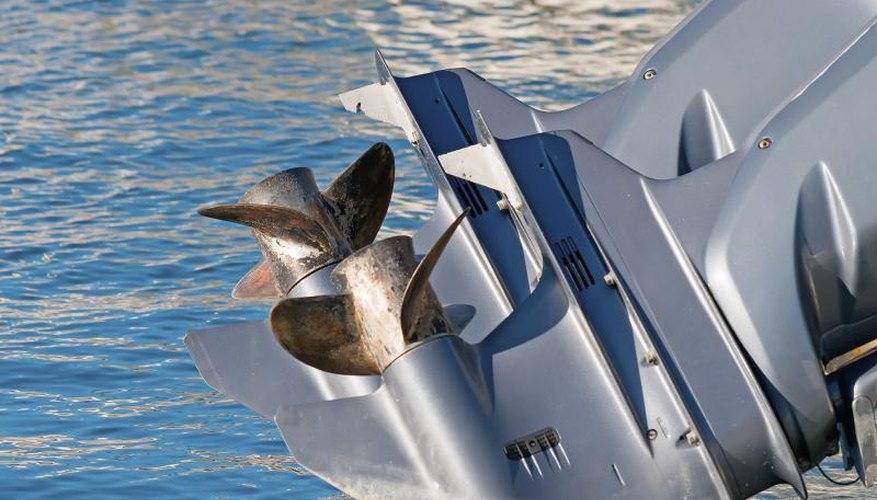
The maintenance schedule for your Mercruiser Alpha One sterndrive is specific. You're supposed to inspect your water pump every 100 hours of operation or annually, whichever milestone occurs first. The not-so-good news is that if the impeller has missing or damaged blades, you have to replace it. The good news is that, even though your boat's an inboard-outboard, the drive unit attached to the transom assembly is the same as an outboard's lower unit.
Items you will need
Oil drain receptacle
Small flat-blade screwdriver
Tape
1/2-inch socket
Small putty knife
Gasket compound
Mercruiser Alpha One Generation One water-pump replacement kit
Mercruiser Alpha One Generation One face seal setting tool
Torque wrench
Torque screwdriver
Mercruiser drive unit oil
Removing the Impeller
Step 1
Tilt the sterndrive up to a 45-degree angle and position an oil drain receptacle below the drive oil fill-and-drain hole. Remove the drive oil fill-and-drain screw and its sealing washer, using a small, flat-blade screwdriver, and set them aside. Remove the vent screw and its washer, and drain the oil from the drive unit. Use a piece of tape to mark the position of the trim tab on the bottom.
Step 2
Remove the trim tab; the nuts, bolts and washers from the port and starboard sides of the unit; and the nut from the front of the unit, using a 1/2-inch socket. Remove the screw found in the well from which you removed the trim tab using a large flat-blade screwdriver. Pull straight down on the drive unit to remove it from the transom assembly.
Step 3
Remove the seal from the face of the water pump body. Pull up on the water-tube coupling to remove it and remove the screws from the water pump body. Slide the water pump body up the driveshaft. Slide the impeller from the driveshaft and pull the impeller key away from the driveshaft. Slide the pump faceplate up and off the driveshaft. Inspect the interior of the pump body for scoring and the pump faceplate for roughness and replace, as necessary. Use a small putty knife to scrape any gasket material from the top of the drive unit.
Reinstalling the Impeller
Step 1
Apply gasket compound to the small-hole gasket found in the Mercruiser Alpha One Generation One water-pump replacement kit. Slide the small-hole gasket, the pump faceplate and the large-hole gasket, in that order, down the driveshaft and into place atop the drive unit. If the faceplate doesn't fit properly onto the position pins on the drive unit, turn it over. Dab some white marine grease onto the impeller key and press it into place in its indention in the driveshaft. Remove the impeller from the pump replacement kit and slide the impeller down the driveshaft and over the impeller key. The impeller blades should curl to the left -- counterclockwise -- when viewed from above. Push the pump body down the driveshaft and over the impeller, turning the driveshaft clockwise as you do so. Align the pump body with the alignment pins on the top of the drive unit.
Step 2
Apply gasket compound to the threads of the four water pump body screws and return them to their bores. Tighten the pump body screws to 60 inch-pounds with a torque wrench. Slide the water pump face seal halfway down the driveshaft. Slide the face seal setting tool over the driveshaft, pull up on the driveshaft and press the seal and tool down the shaft until the seal snaps into place. Spread marine lubricant on the water-tube coupling O-rings and press the water-tube sleeve and O-rings onto the water pump body without damaging the O-rings.
Step 3
Lift the drive unit to the transom assembly and push its water tube into the drive unit's water-tube sleeve. Slide the driveshaft into the transom assembly without touching the driveshaft to any part of the transom assembly while doing so. Apply threadlocker to the threads of the the nuts, bolts and washers you removed from the port and starboard sides of the unit; to the nut from the front of the unit; and to the screw found in the trim tab well.
Step 4
Re-pace the washers, bolts and nuts around the sides of the drive unit and torque to 35 foot-pounds with a torque wrench. Torque the nut at the front of the unit to 35 foot-pounds. Torque the screw in the trim tab well to 28 foot-pounds, using a torque driver. Reinstall the trim tab, aligning it with the tape, and torque the screw to 23 foot-pounds. Lower the drive so the anti-cavitation plate is parallel to the ground and refill the drive unit with Mercruiser drive unit oil. Replace the drain and vent screws and tighten snugly.
Warnings
- When you install a new impeller, never turn the driveshaft counterclockwise to make small adjustments. Instead, turn the shaft clockwise, even if it means turning the shaft all the way around. Doing otherwise will damage the impeller severely.
Tips
- Screw a defunct metal, cooking pot to your workbench to stash the screws, nuts and bolts you remove during the water pump and impeller change. There are just too many to shove into a pocket without losing at least one.
References
- Mercury Mercruiser Service Manual Number 14 - Sterndrive Units Alpha One, Generation II
Tips
- Screw a defunct metal, cooking pot to your workbench to stash the screws, nuts and bolts you remove during the water pump and impeller change. There are just too many to shove into a pocket without losing at least one.
Warnings
- When you install a new impeller, never turn the driveshaft counterclockwise to make small adjustments. Instead, turn the shaft clockwise, even if it means turning the shaft all the way around. Doing otherwise will damage the impeller severely.
Writer Bio
Will Charpentier is a writer who specializes in boating and maritime subjects. A retired ship captain, Charpentier holds a doctorate in applied ocean science and engineering. He is also a certified marine technician and the author of a popular text on writing local history.


