


The majority of entry-level road and mountain bikes employ a two-piece crank. This type of crank uses a sealed cartridge and is changed as a unit. Old-school bikes, cruisers or cheaper bikes employ a one-piece crank with serviceable, caged bearings inside the bottom-bracket. If you feel a scraping, hear a grinding noise or pedals are hard to turn, the bearings should be removed for maintenance or replacement.
Items you will need
15-millimeter wrench
Screwdriver
32-millimeter wrench
Adjustable wrench (optional)
Hammer
Grease
Step 1
Stand the bike upside down or place it in a bike stand. Remove the pedal on the opposite side from the chain. Use a 15mm wrench, turning it clockwise to remove the pedal.
Step 2
Slide a screwdriver under the chain to remove it from the front gear, and allow it to hang loose from the back gear. Use a 32-mm wrench, or an adjustable wrench, to loosen a large nut where the crank enters the bottom bracket. The bottom bracket is the large cylinder on the frame, or the axle of the crank. Turn the nut clockwise to remove it. Slide it up and off the end of the crank.
Step 3
Remove a keyed washer from the crank with your fingers. The keyed washer has one or two tabs that fit into slots. Check this orientation for replacement in the same manner.
Step 4
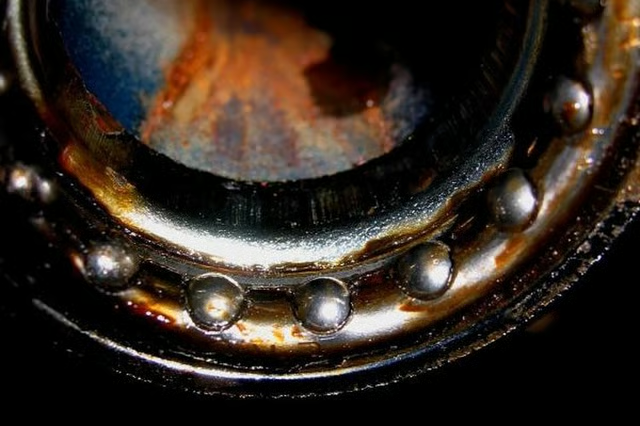
Place the tip of a screwdriver into one of the slots on the cone. The cone is a flat surface covering the bottom bracket, the crank passes through it. Tap the screwdriver gently with a hammer to loosen the cone in a clockwise direction. When the cone is loose, unscrew and remove it with your fingers to reveal the caged bearing.
Step 5
Slide the caged bearings up and off the crank. Turn the crank slightly to one side, and push it through the bottom bracket to the other side and remove the crank from the bike. The bearing on the other side will come out with the crank.
Step 6
Apply grease to the new bearings, and to the bottom bracket area where the bearings fit, with a cotton swab or your finger. Coat them with a small amount of grease. Slide the bearing onto the crank on the side with the gear, as far as it will go. The bearings should face the bottom bracket.
Step 7
Slip the crank through the bottom bracket from the gear side. Slide the other caged bearing onto the crank on the other side, with the bearings facing the bottom bracket. The bearing should fit flush into the bottom bracket.
Step 8
Slide the cone over the crank and thread it into the bottom bracket with a counterclockwise motion. Use the screwdriver to tighten it slightly by tapping the slot as you did when you removed it.
Step 9
Slide the large nut over the crank and thread it onto the bottom bracket with a counterclockwise motion. Tighten it with a 32-mm wrench or an adjustable wrench. Install the pedals to finish.