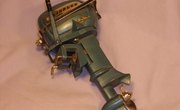
The operation and maintenance manual provided with every Johnson outboard contains a checklist and schedule of required periodic maintenance. As an example, Johnson recommends servicing the fuel filter after every 100 hours of operation or at least once every boating season. If the fuel filter element on your Johnson 8 horsepower engine has become damaged or badly worn, replacing it will only require a few minutes of your time and one simple tool.
Items you will need
Slotted screwdriver
Step 1
Disconnect the fuel tank hose from the engine.
Step 2
Pull the engine cover release and remove the cover. Set it aside.
Step 3
Locate the fuel pump assembly. As you look at the engine, it will be midway on the right side. The filter is directly under the fuel inlet cover, which is secured with a single captive screw which can be loosened but not removed.
Step 4
Turn the screw counterclockwise until the inlet cover is freed.
Step 5
Remove the old filter element from atop the fuel gasket.
Step 6
Install the new filter element, keeping the lip of the unit facing toward the fuel gasket.
Step 7
Reinstall the fuel inlet cover by turning the screw clockwise. Tighten it securely, but do not overtighten it, or you may strip the threads, resulting in fuel leaks or the need to replace the entire fuel pump.
Step 8
Reconnect the fuel tank and squeeze the primer bulb a few times. Check the inlet cover for leaks. If any fuel is leaking, tighten the screw a bit and repeat the process until the leaking stops. Be sure to wipe up any spilled fuel.
Step 9
Reinstall the engine cover.
Writer Bio
Rich Finzer earned his boating license in 1960 and started his writing career in 1969. His writing has appeared in "Northern Breezes," "Southwinds," "Living Aboard," "Good Old Boat," "Latitudes & Attitudes," "Small Craft Advisor," "Life in the Finger Lakes," "BackHome" and "Dollar Stretcher" magazines. His maple syrup has won awards in competition. Rich has a Bachelor of Science in communications from Ithaca College.


