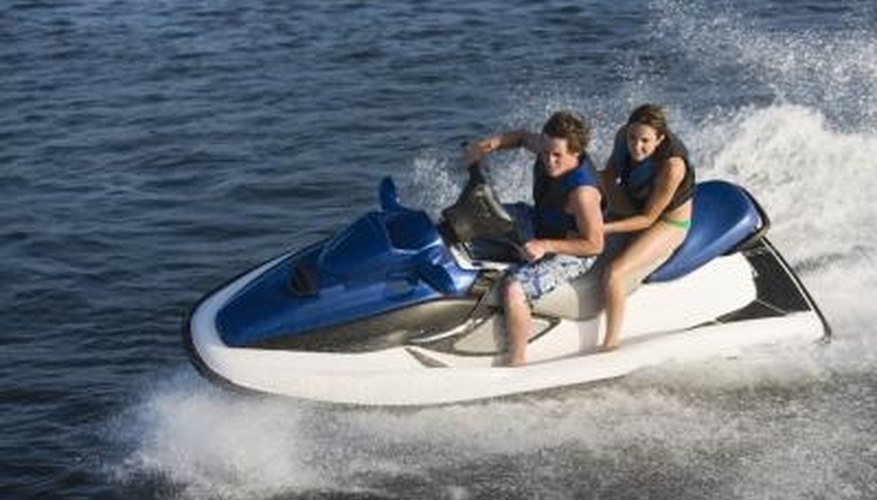


Approach the troubleshooting process for your Yamaha WaveRunner as you would a book; start at the beginning -- for the WaveRunner, the electrical system -- and move through the process in a logical and straightforward manner, always asking yourself what comes next, that could cause this problem. You'll need to connect and disconnect the battery a few times while you work through the troubleshooting process, and you must contain any fuel spills as well.
Items you will need
Ring terminals
Spade terminals
Wire
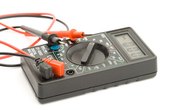
Digital multimeter
Emergency shutdown lanyard
New fuel
5/16-inch box-end wrench
3/8-inch box-end wrench
Step 1
Inspect the wiring for loose or ratty connections, or corroded terminals. Replace any terminals or wires that are not in excellent condition.Turn the dial of a digital multimeter to the DC voltage reference. Place the red probe on the positive battery post, marked with a “plus sign” and the black probe on the negative battery post. The battery should read 14.2 VDC for gel-type batteries and 14.4 VDC for standard wet-cell, lead-acid batteries.
Step 2
Turn the dial to the “Ohms” setting on the multimeter. Move the black probe to the IGN terminal on the key switch. There should be at least 14 VDC at the IGN terminal on the key switch. Move the red probe to the positive terminal on the starter. Expect low or no resistance. If there is resistance, switch probes, using the black probe instead of the red probe. If there is still resistance, there’s a short circuit between the ignition switch and the starter. Disconnect the battery using the proper wrenches and compare all circuits to the wiring diagram in the service manual.
Step 3
Replace any damaged wiring and tighten any loose connections. Place the lock plate – on the end of the emergency shut-down lanyard – on the emergency shutdown plate, on the port, or left, handlebar before you try to start the motor.
Step 4
Open the fuel tank and ensure you have new fuel. Open the fuel-shut off valve from the tank. Reconnect the battery, starting with the red, positive wire. Do not crank the engine for more than 15 seconds. After a failed start attempt, allow the starter motor to rest for at least 15 seconds before you attempt to start the motor again. After the third attempt, wait for one minute for attempting a restart.
Step 5
Disconnect the battery again. Position a shop rag beneath the fuel hose/carburetor quick-connect, to catch any fuel that may be in the fuel hose. Squeeze the carburetor’s quick connect and push the fuel hose from the carburetor, if you have new fuel in the tank. Position a catch-basin beneath the fuel line and squeeze the primer bulb until fuel flows from the fuel hose. Reconnect the battery and attempt to start the engine.
Warnings
- Disconnect the negative cable of your battery before performing any maintenance or diagnostic work on your boat’s electrical system to prevent electrical shock. Remove the nut from the negative post with a 5/16-inch box-end wrench. Lift the cable from your battery, move it outside of the battery box. Remove the cable from the positive post, using a 3/8-inch box-end wrench, and close the lid of the battery box. After the work is complete, reconnect the battery cables.
Tips
- Gasoline will begin to break down in a few weeks, even if you add a fuel stabilizer with every tankful of fuel. “Stale” fuel is a very common cause for failure to start. Pump the old fuel out of the tank and replace it with new fuel and attempt to start the engine.
- Remember to connect a garden hose to the engine's flushing connection, but do not turn the water on until the motor starts.
References
- BoatUS Boat Tech; Battery Chargers; Don Casey
- "Yamaha WaveRunner GP1200 Service Manual LIT-18616-02-15 F0X-28197-ZA-11"; Yamaha Motor Co., Ltd; 2000
- "Evinrude Repair Manual -- 2.5- to 250-Horsepower Models, 2002-2007"; Seloc Marine; 2007
Tips
- Gasoline will begin to break down in a few weeks, even if you add a fuel stabilizer with every tankful of fuel. “Stale” fuel is a very common cause for failure to start. Pump the old fuel out of the tank and replace it with new fuel and attempt to start the engine.
- Remember to connect a garden hose to the engine's flushing connection, but do not turn the water on until the motor starts.
Warnings
- Disconnect the negative cable of your battery before performing any maintenance or diagnostic work on your boat’s electrical system to prevent electrical shock. Remove the nut from the negative post with a 5/16-inch box-end wrench. Lift the cable from your battery, move it outside of the battery box. Remove the cable from the positive post, using a 3/8-inch box-end wrench, and close the lid of the battery box. After the work is complete, reconnect the battery cables.
Writer Bio
Will Charpentier is a writer who specializes in boating and maritime subjects. A retired ship captain, Charpentier holds a doctorate in applied ocean science and engineering. He is also a certified marine technician and the author of a popular text on writing local history.